What is Patreon? It’s a website where I can offer the video classes and blog tutorials people have been asking me to create for, well, years!
Just like back in the days of the Renaissance, the idea was to develop a way for “Patrons” to support artists not by donating money to them, but by paying them to create things that their patrons wanted.
Fast forward to modern times. The platform is used by artists and creators (fine artists, writers, actors, musicians, etc). Basically, it’s like paying for an online class/education/entertainment but you receive it and so much more! Because instead of like a real world class where you only receive what is taught that day, you receive the class you came for and every other class I have created on Patreon, all for the same fee. If you pledge a monthly amount then you’ll always have access to all of the content for as long as you’re subscribed.
The fees are in tiers so the higher your pledge amount the more content you’ll have access to learn from for a minimum of one month if you pledge on the first of a month.
Below are the answers to questions you may have directly from my Patreon page currently under construction.
Why am I joining Patreon?
I truly enjoy sharing information. Having been self-employed in creative fields since 1997 people have (for years) asked me to create videos that clearly illustrate my creative processes. Almost as often, I’m asked to share how I became an entrepreneur and the ways I approach running my own small businesses. When I learned about Patreon I realized this is a place where I can share information on both topics. Because of the time involved in producing videos I needed a solution that would allow me to do so in a mutually beneficial way. On Patreon I can create requested content (like online classes and tutorials) for my patrons and at the same time generate a revenue stream to cover the production time/costs. I hope you’ll think that’s a win-win too.

What am I offering my patrons?
Inspiration will be included in all endeavors because that’s just how I see life: A place to learn lessons and to embrace possibilities. Each month I will post multiple behind the scenes photos and at least two blog posts (one focusing on my art the other on entrepreneurship), and one video tutorial. I hope to have more than one video per month but since creating videos is new to me, I’d rather under-promise and over-deliver. As I become more adept at video production I’m certain I can increase the number of videos per month in the near future. Higher tiers also have rewards of Tinygami care packages shipped at the end of your subscription year.
How can you become a patron?
Just choose a pledge amount from the sidebar and click on “become a patron.” It’s a monthly subscription based fee billed on the first day of each month. Note: It is not pro-rated so if you want maximum benefits sign up on the first of a month. You’ll receive a monthly notification from Patreon as a thank you and reminder that the pledge has been charged to your account. You receive access to all content previously created as well as new content each ongoing month you are subscribed. Also, you can cancel at anytime with your request taking effect at the end of the most current month for which you’ve already received content for.
So that’s it. Just a little update, a sneak peek at what April will bring. I will be adding a Patreon link on April 1st to my website. If you have a request for a particular online class or tutorial please message me via my website or leave a comment in this post. I’ll let you know if it’s something I can do and add it to my list of future projects to create.


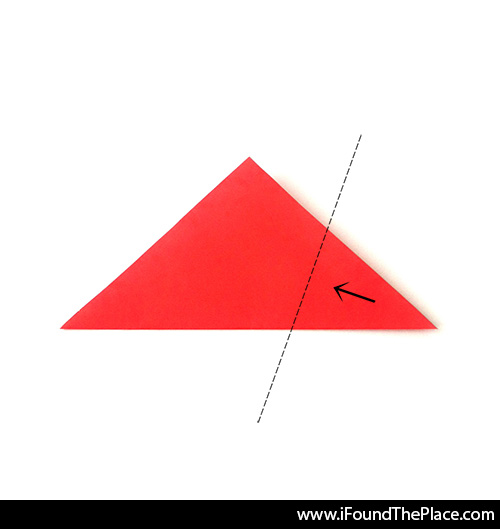
 3. Now do the same with the left section folding it across and over the right section you just folded. Set crease.
 4. This next step you can fold both of the upper flaps at once or do them individually as you fold and tuck them into the cup. Either way you fold them against the top of the cup along the dashed line. I prefer to do that individually which is how they are pictured in the tutorial.
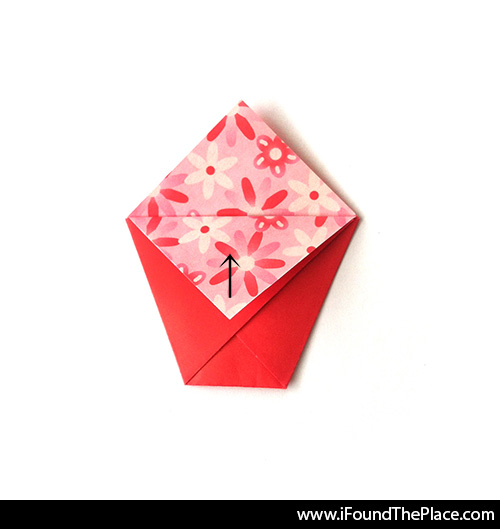 5. This is a guideline fold to make it easier to tuck the flap into the cup so once you fold the first flap down, immediately unfold it back to its original position. (I used a more decorative origami paper with one printed side and a solid color side instead of the more typical colored on one side and plain white on the other.)
 6. It should look like this.
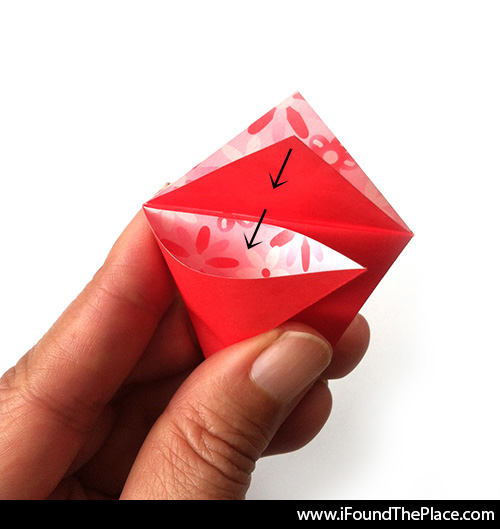 7. Now you tuck the flap into the front pocket of the cup. This would be the left front section.
 8. Now fold the remaining flap forward and up again like the last one if you didn’t do them both at the same time and tuck it into the large opening to form the cup.
 9. That’s it! You’re done! Congratulations and thank you for visiting the Tinygami blog 🙂
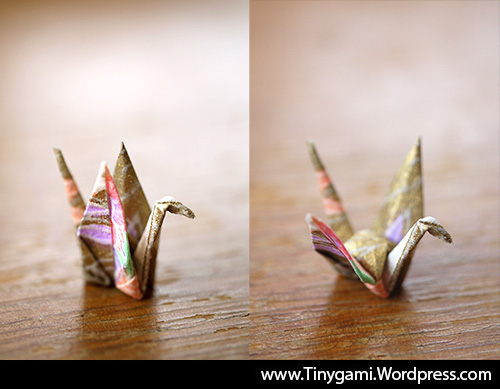
 1. Begin with a square piece of paper. Here I’m using a 3″ square of origami paper.
 4. You’ll use the center crease as a guideline and fold the right outer edge towards the center guideline.
 5. Now fold the let outer edge towards the center as well.
 6. Your model should look like this.
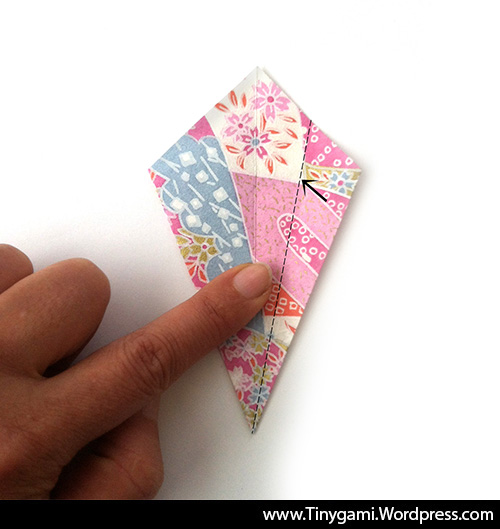 7. Turn over your model and repeat the same two folds to narrow the shape. Pictured above fold the right outer edge towards the center line.
 8. Now fold the left outer edge towards the center.
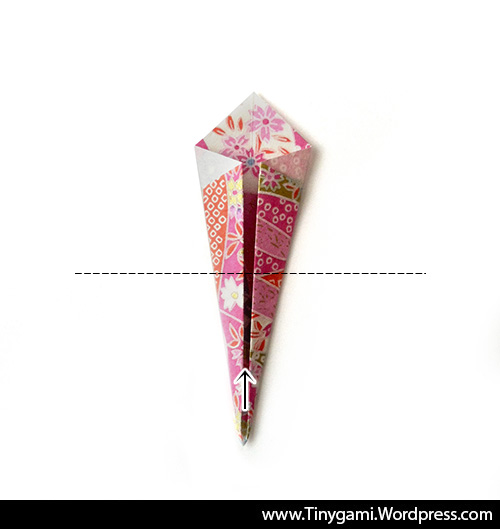 9. Your model should look like this. Note the dashed line at the center of the model. Fold the model in half taking the point on the bottom and folding up to the point at the top.
 10. After the model is folded in half it’s time to fold the head. I like to visualize an imaginary line from the edge of the top corner of the white triangle (the backside of the paper) and fold the paper downward.
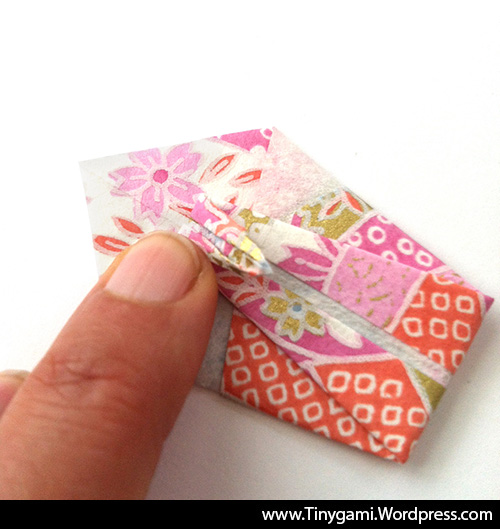 11. This is what your model should look like. Layered upon itself accordion style is the body, then neck, then head.
 12. Now lift up the model and holding it accordioned together you’ll fold the model in half following the arrows so the left edge and right edge meet together creating the base of the swan.
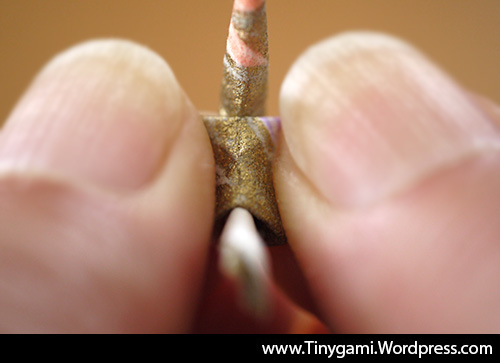
 13. Hold the base with your fingers and use your other hand to gently pull the neck upright away from the body.
 14. Once the neck is pulled upright be sure to pinch along the base to set the fold in place.
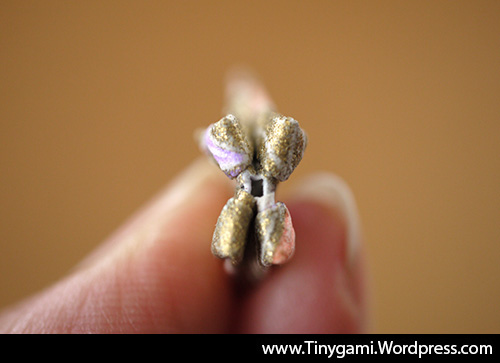
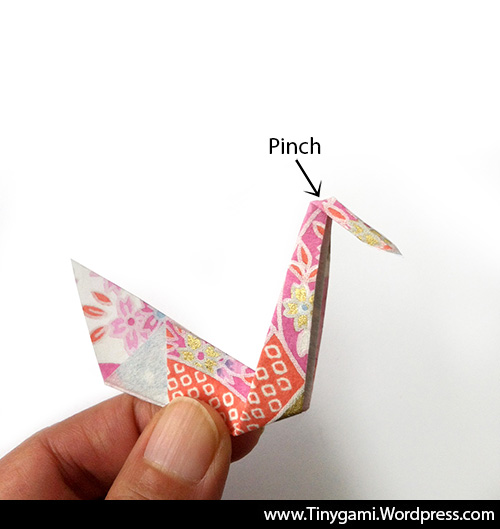 16. Then pinch the top of the head to hold the fold in place.
